How to use conda-build to build a Python package with C/C++ dependencies

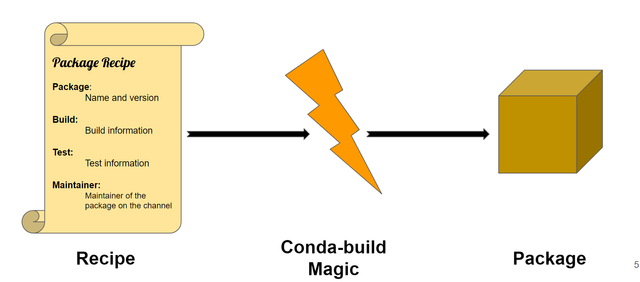
Image credit: Mahe Iram Khan
conda-build is an application that automates the process of building and distributing Python packages. It is a powerful tool that has the added advantage of handling dependencies that require C/C++ or other languages. This is particularly useful for scientific computing, where many Python packages have complex dependencies and require specialized libraries and tools.
A recipe outlines the steps needed to build a package from source code. We can create this "recipe" using grayskull. A recipe includes all the necessary information, from downloading and installing dependencies to compiling the source code and creating the final package. Conda-build then renders the recipe to build the package. A recipe typically includes:
- A script that contains metadata.
- The script that installs the files for the package on macOS and Linux.
- The build script that installs the files for the package on Windows.
- Any additional setup files, depending on the complexity of the package.
In this article, we will guide you through the process of building your Python package with conda-build! conda-build can help us handle even the most complex dependencies for our package, making the process smoother and more efficient. Let's get ready to build an amazing Python package!
Getting Started
Prerequisites
Let's start building our own Python package. First, you need to ensure that you have a functional conda installation (e.g. via Miniconda or Miniforge). You can then use conda to install conda-build.
Installing conda-build
conda-build is usually installed in your base environment, next to conda:
$ conda install -n base conda-build
Creating a template for the recipe
For this tutorial, we'll be walking you through the process of building a recipe for PyPI's click package using Grayskull. Grayskull is an automatic conda recipe generator that is used for creating recipes for Python packages on PyPI and non-PyPI packages available on GitHub. PyPI is among the various repositories available for Python packages on the internet.
$ conda install grayskull
$ grayskull pypi click
You can use any package available from PyPI instead of click
After executing this command, a new directory called click will be generated. Inside this directory, you'll find a file named meta.yaml. This file contains all the metadata necessary to create a conda package, such as the package name, version number, source code URL, installation instructions, dependencies, license, and more. Note that if you didn't use the grayskull command, you'll need to manually write the script yourself. You can make any changes to the meta.yaml file and add yourself as the maintainer and distributor of your package.
Building the package
To build your click package, run this command from the root folder:
$ conda build click
After the build process is finished, conda-build will generate a package file in the conda-bld directory.
To locate this file, you can use this command from the terminal:
$ conda build click --output
You can now install the package locally by running this command in the terminal:
$ conda install --use-local click
Congrats 🎊🎉, you have successfully downloaded your own package! You can modify this package and upload it to Anaconda.org.
Building a package with C/C++ dependency
With conda-build, it is extremely simple to include non-Python packages. In this example, we will add gcc as a build dependency and mylib as a runtime dependency. We will also add a new step to compile mylib.cpp into a shared library called mylib.so.
In the meta.yaml file, you can include the following and build the package again:
build:
  script:
    - g++ -o mylib.so -shared -fPIC mylib.cpp
    - cp mylib.so "{{ PREFIX }}/lib"

requirements:
  build:
    - gcc
  run:
    - mylib
This example is intentionally simplified for teaching purposes. It doesn't address host dependencies, build tools like make, ABI compatibility, etc.
For example, conda-build users often rely on Jinja templating to obtain the correct compiler for the platform, instead of hardcoding the compiler (gcc) directly.
Check the documentation for the compiler() function.
For real-world examples, you can check some recipes in this conda-forge search.
Testing the package
After successfully creating our package, we can now proceed to create another conda environment on our machine and use the newly created package. Additionally, we can also upload the package to Anaconda.org and distribute it to others or create our channel.
To install the package on our local machine, we will create a new conda environment for our package, activate it, and then install our package. You can do that by using the following commands:
$ conda create -n test_env
$ conda activate test_env
$ conda install --use-local click
Use the following command to upload your package to Anaconda.org.
$ conda install -n base anaconda-client  # if you don't have it yet
$ anaconda upload /path/to/my_package-1.0-0.tar.bz2
You can upload your package to any existing channel you have access to, including one you create for yourself, and distribute it to others. Learn more about creating custom channels.
Conclusion
In conclusion, using conda-build to create and manage Python packages can simplify the process of distribution and installation of software packages. With conda-build, you don't have to reinvent the wheel or write code from scratch - instead, you can rely on pre-built packages and easily integrate any non-Python dependencies into your projects. Conda-build can be used as a one-stop solution for all your package management needs.